Getting Started with NDFC
About This Document
Section titled “About This Document”This document serves as a guide for getting started with Nexus Dashboard Fabric Controller (NDFC).
Prerequisites:
- Nexus Dashboard (ND) node with the NDFC deployment mode.
- [[Installing ND v3.2.x on ESXI]]
- CML or EVE-NG running at-least 3-4 Nexus 9000v switches.
- Mgmt0 interfaces of N9Kv devices must be reachable via NDFCs Mgmt or Fabric interfaces.
This guide uses version Nexus Dashboard 3.2(1i) and the latest NDFC version.
Instructions will be indicated bellow the associated screenshot.
Document Overview
Section titled “Document Overview”This document will cover the following topics:
- Navigating to the NDFC view.
- Configuring key system settings.
- Setting up default device credentials.
- Creating an NDFC fabric.
- Explaining different fabric types.
- Discovering switches and inventory.
- Assigning device roles and caveats.
- Deploying changes.
- Using the topology.
Launching NDFC
Section titled “Launching NDFC”Browse to the Nexus Dashboard GUI via https://<node-mgmt-ip>.
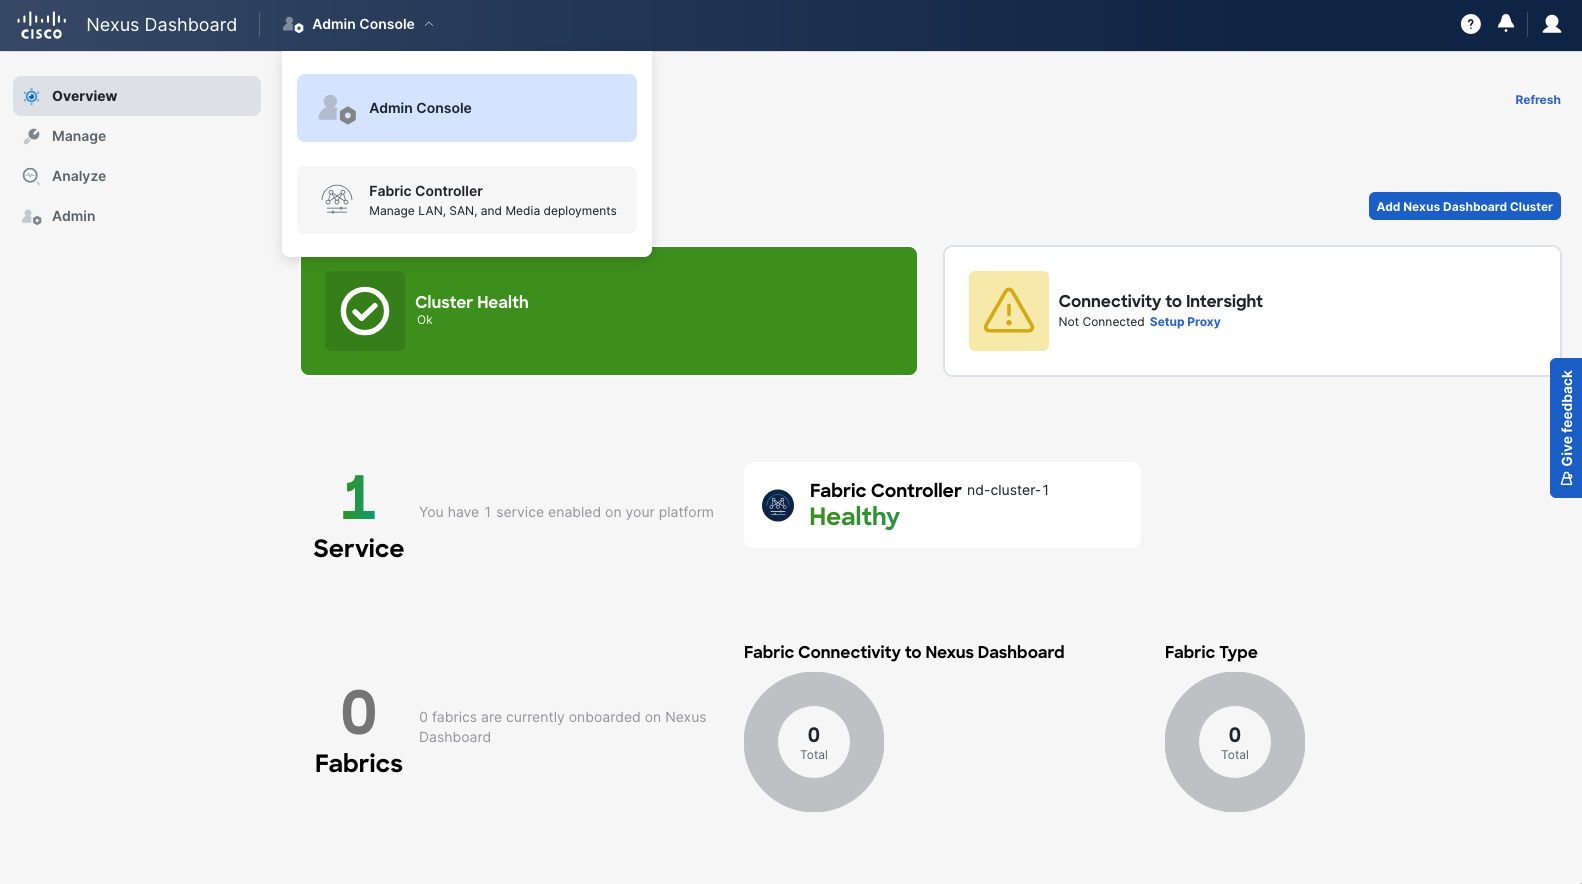
At the top of the Dashboard, select the drop down next to the Nexus Dashboard text.
Then select Fabric Controller as the view.
System Settings
Section titled “System Settings”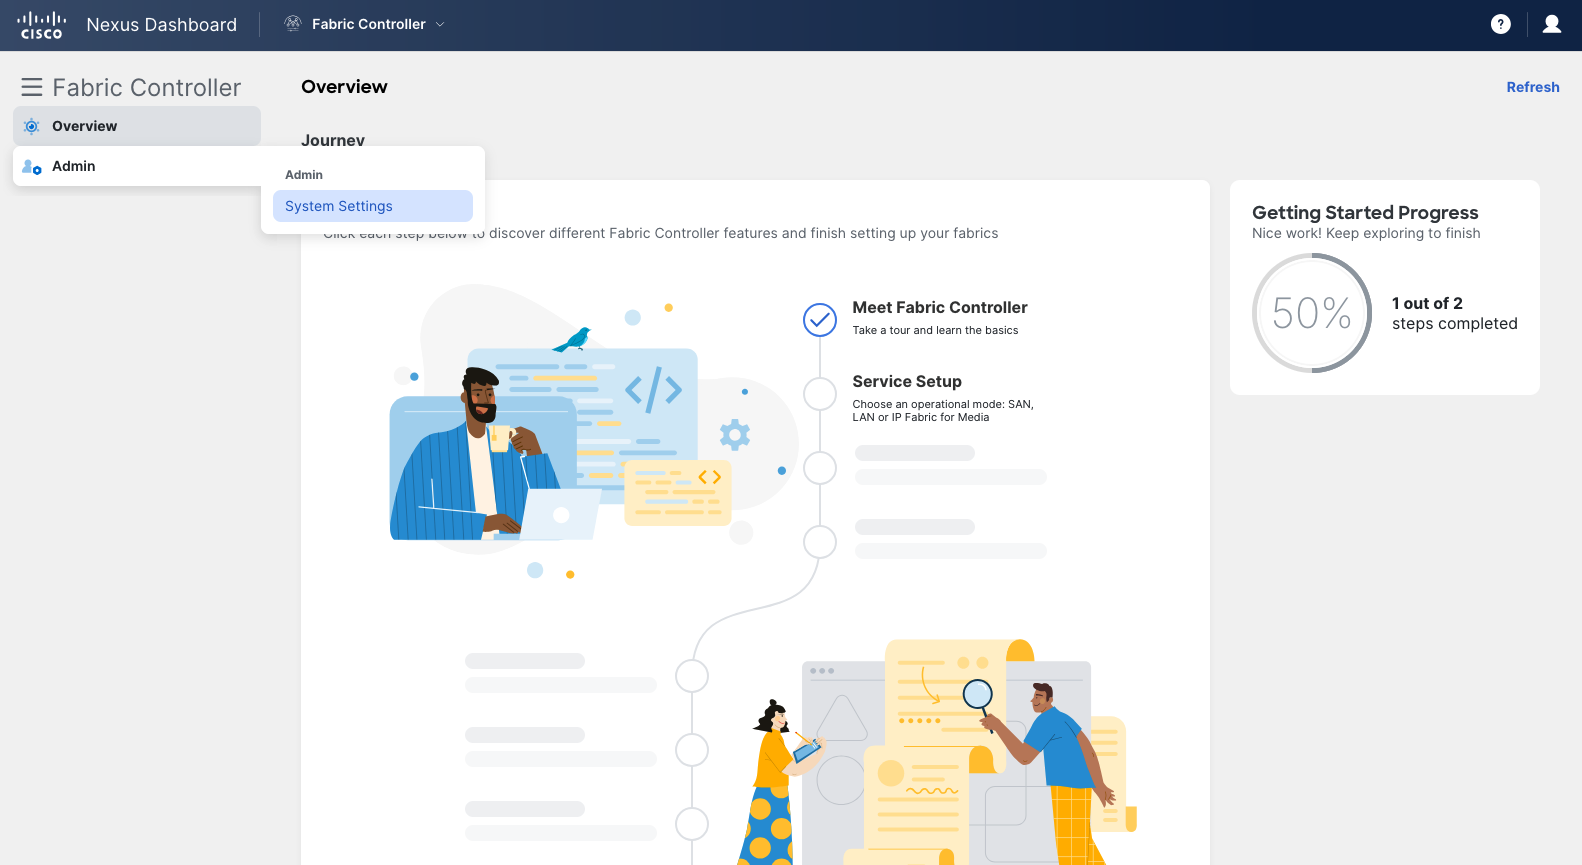
Rather than jumping straight into Service Setup via the Journey View, navigate to the Admin > System Settings tab.
LAN Device Connectivity
Section titled “LAN Device Connectivity”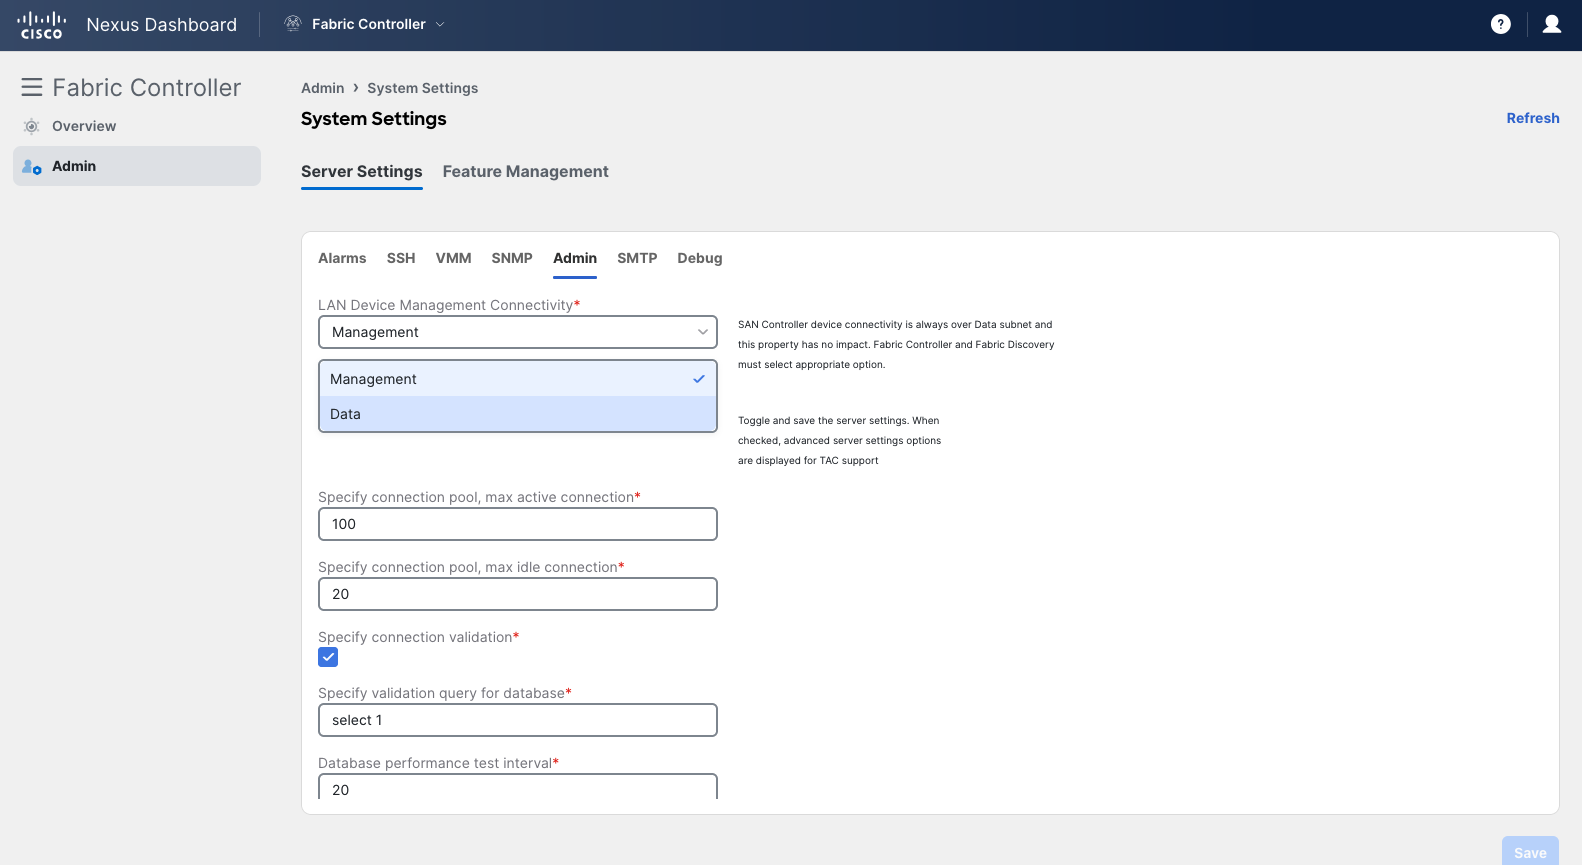
Navigate to the Admin sub-tab, and change the LAN Device Management Connectivity setting which interface you want to communicate with switches/devices with.
Reference the [[Installing ND v3.2.x on ESXI]] MOP to learn about initial configuration of these networks.
For this demo enviorment, the Nexus Dashboard Fabric Interface (Data) is connected to the subnet that N9Kv devices share, so I will be setting this to Data.
Once or if changes, click the “Save” button at the bottom right.
Services Setup
Section titled “Services Setup”This step can be completed via Journey View > Services Setup, or here in settings under Feature Management.
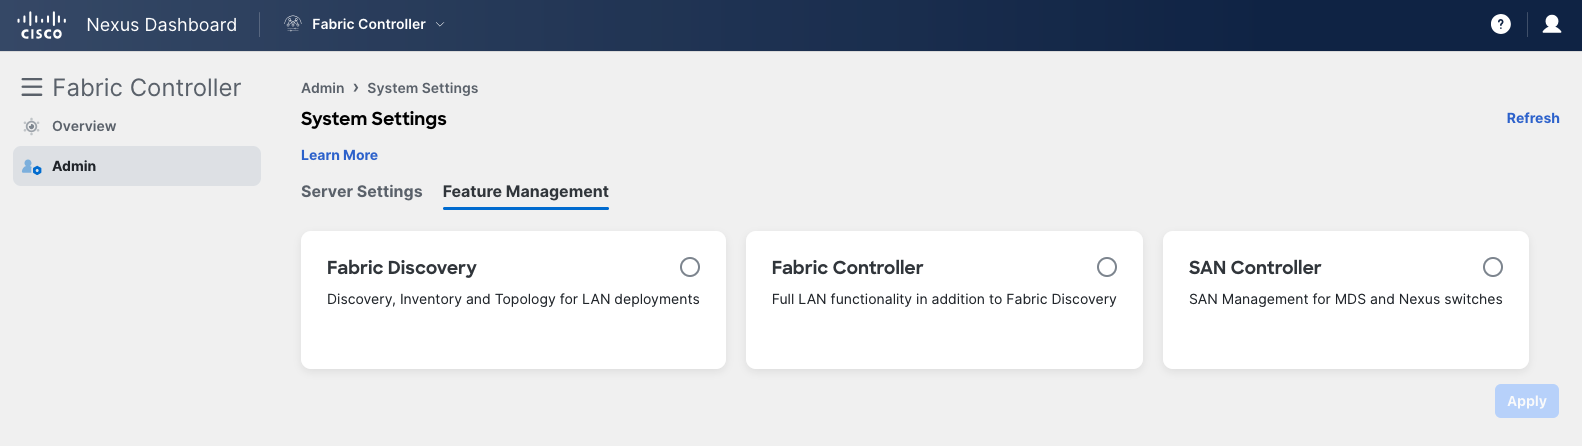
Here you must select what Feature / Operational Mode that NDFC will run.
Fabric Discovery
Section titled “Fabric Discovery”This feature focuses exclusively on LAN Monitoring.
This includes adding switches and devices via discovery, viewing the topology, and running show commands.
This mode CANNOT perform exec commands or perform any configuration changes.
Fabric Controller
Section titled “Fabric Controller”This feature is the standard NDFC mode.
This includes all core functionality of a Network Manager that is expected:
- Inventory & Discovery
- Topology View
- Show Commands
- Exec Commands
- Automated Configuration Templating
- Deployments
Note that the above features of Fabric Controller mode are what is considered the “Fabric Builder” sub-feature, which is enabled by default when selecting this mode.
This mode also includes many optional sub features:
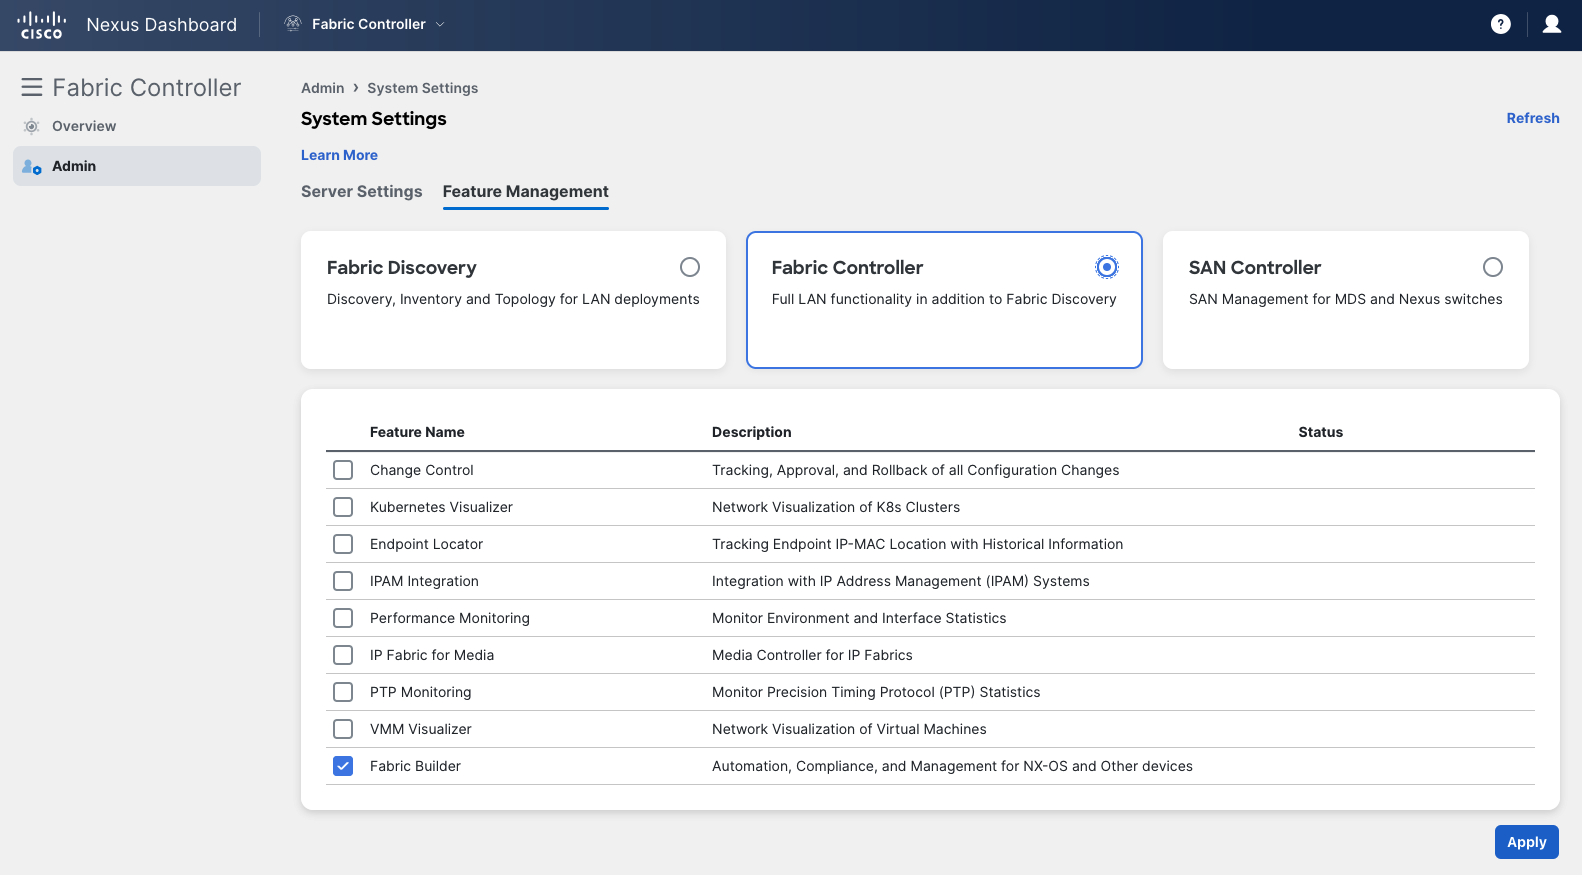
For getting started, it is recommended to start with just Fabric Builder. Then once comfortable, explore into Change Control, Endpoint Locator, etc.
Once decided, click the “Save” button at the bottom right to enable.
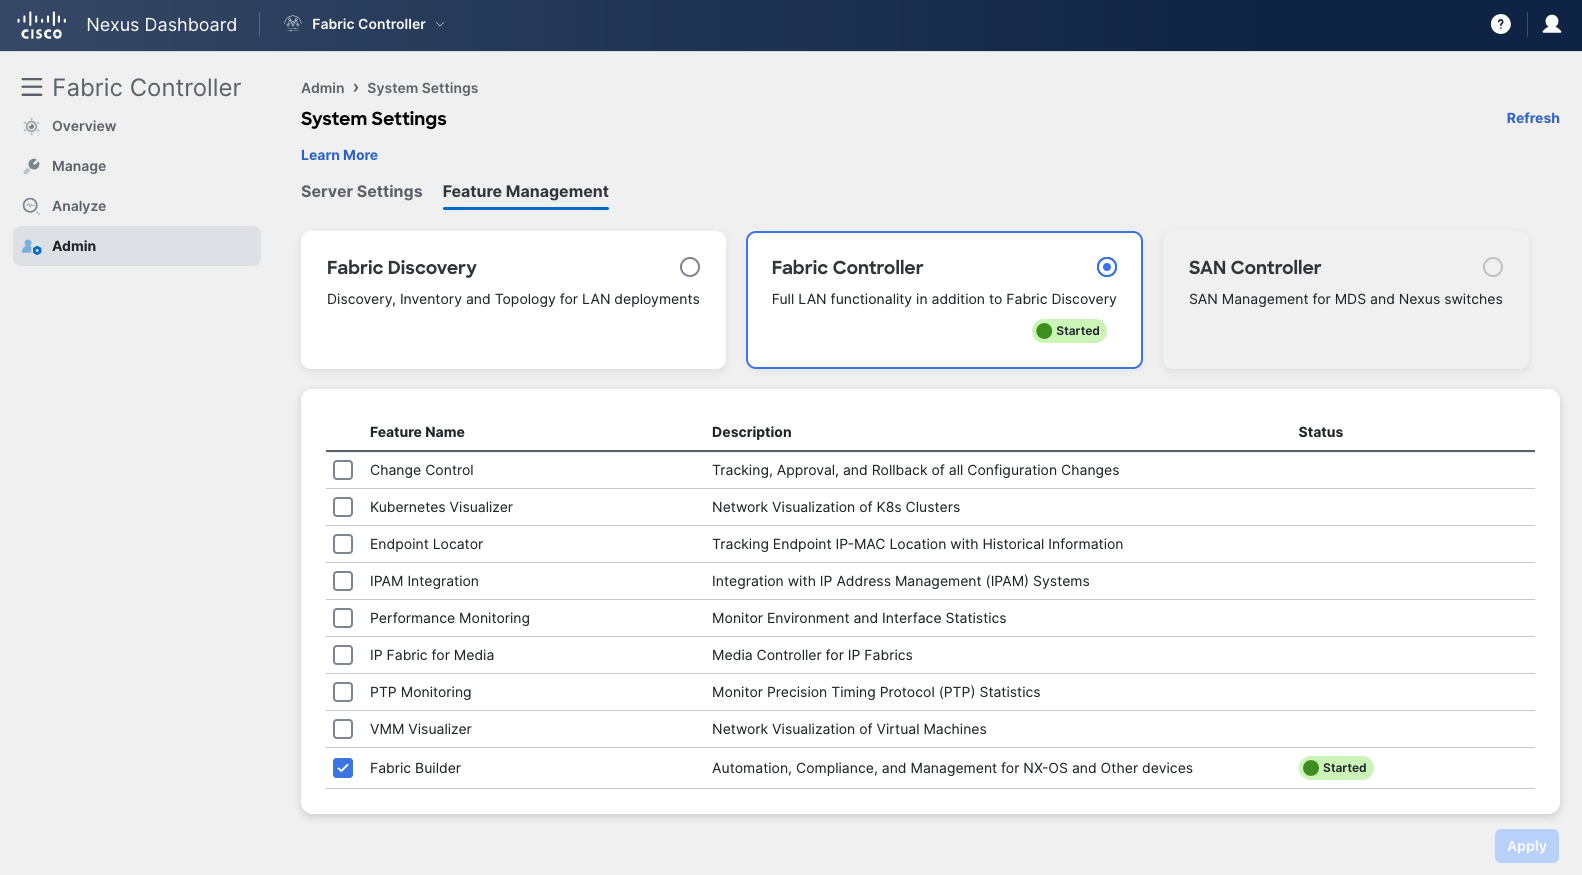
Then wait for the process to finish initializing, then refresh to see the new feature set options in the side-bar.
Switch Credentials
Section titled “Switch Credentials”This part of the process will set default device credentials, so that devices without explicit authentication details can fallback to a standard set of credentials.
Navigate to Admin > Switch Credentials via the side-bar.
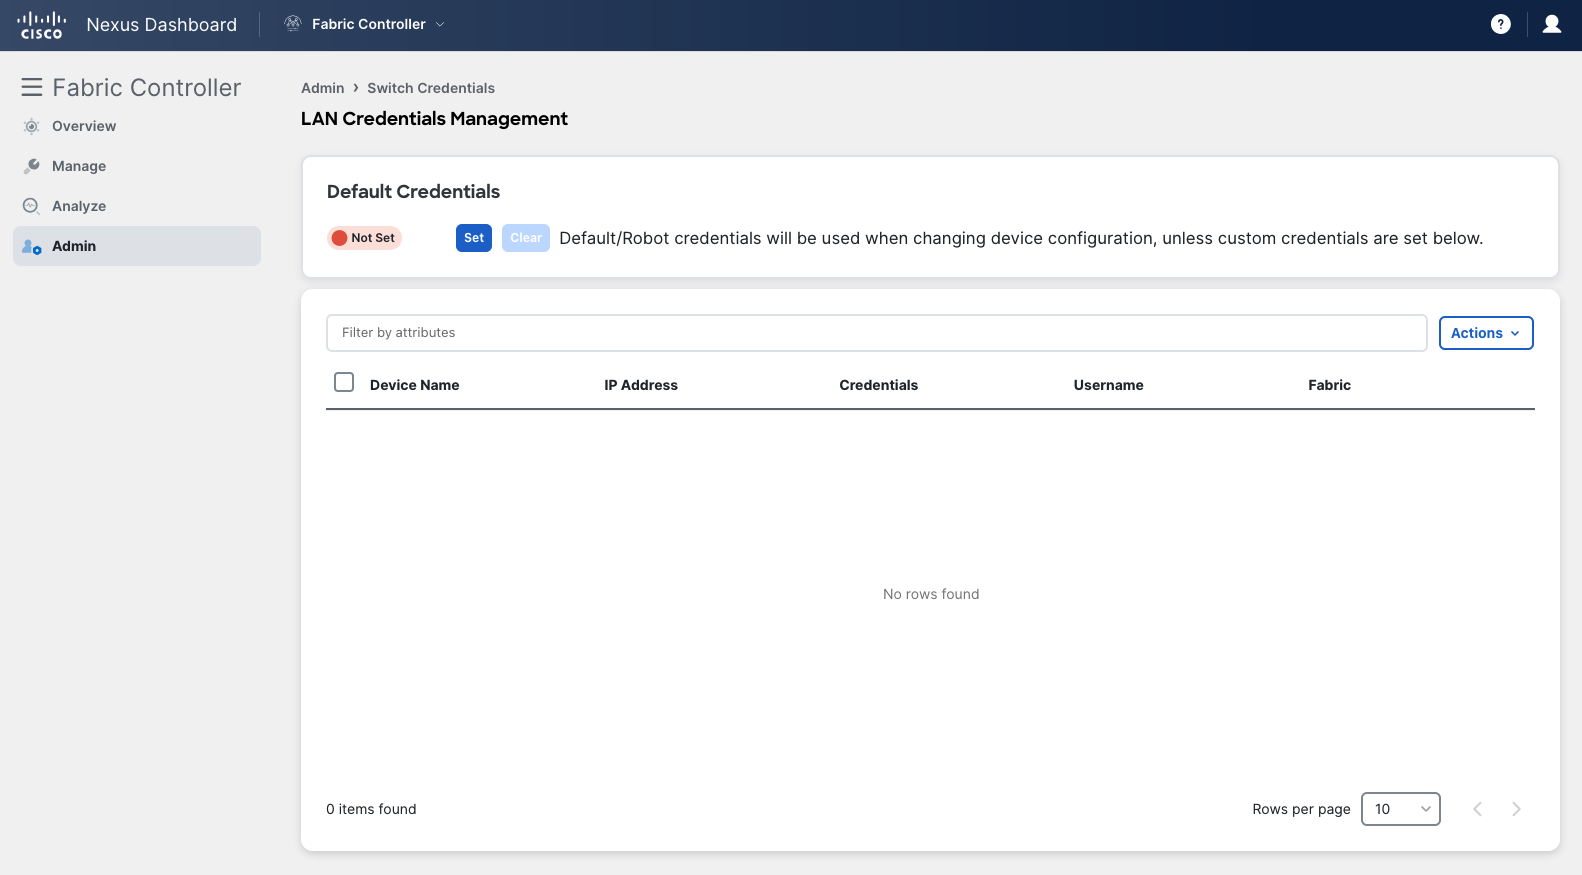
Click the “Set” button at the top to start configuring.
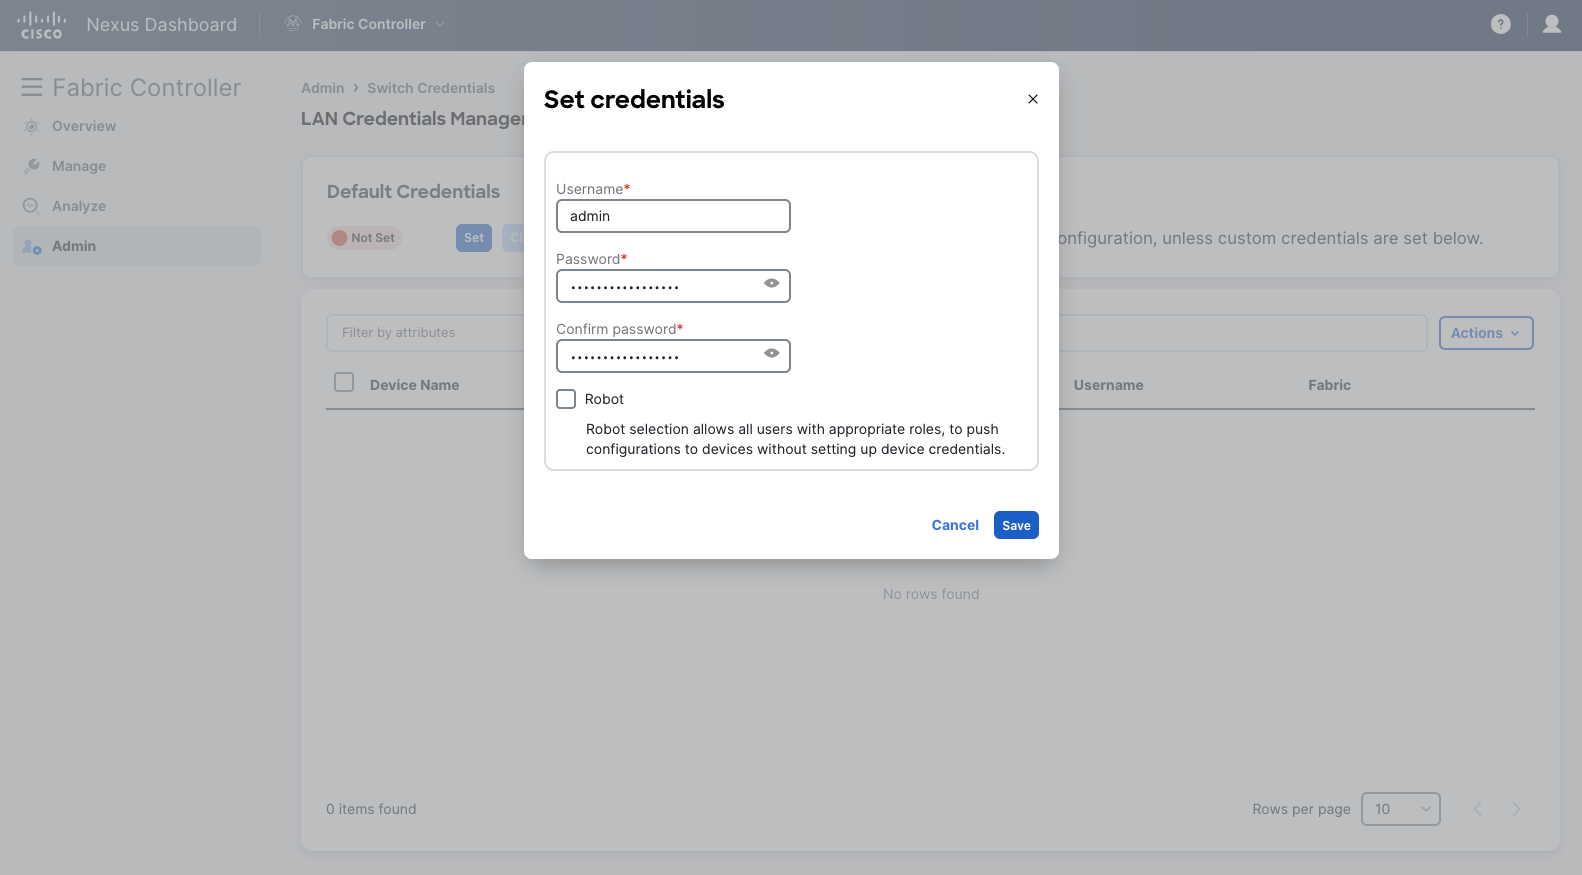
Enter the username and default password for the locally configured users on your switches.
This would be the same credentials as configured on your Nexus 9000v switches like:
(config)# username admin password cisco role network-administratorOnce the details are entered, click the “Save” button at the bottom right.
Creating Fabrics
Section titled “Creating Fabrics”Now for the fun part, making your first fabric!
Fabrics are logical containers with switches such as Nexus 9000, 7000, Catalyst 9000, 3rd party devices and more.
Navigate to the Manage > Fabrics tab of the side-bar.
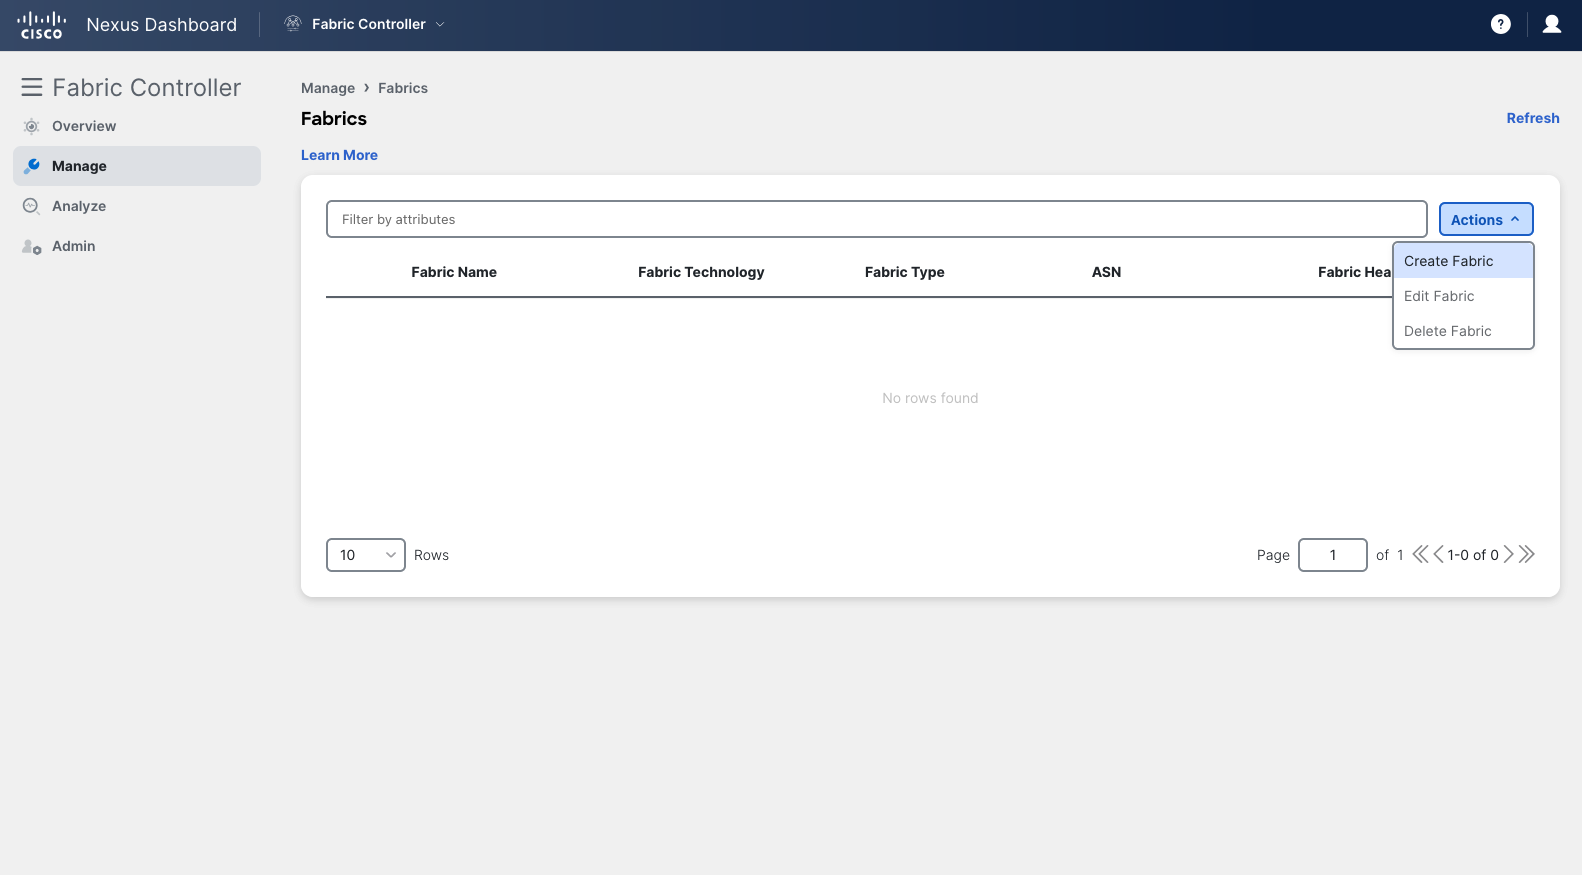
Select the “Actions” drop-down and select “Create Fabric”.
Naming the Fabric
Section titled “Naming the Fabric”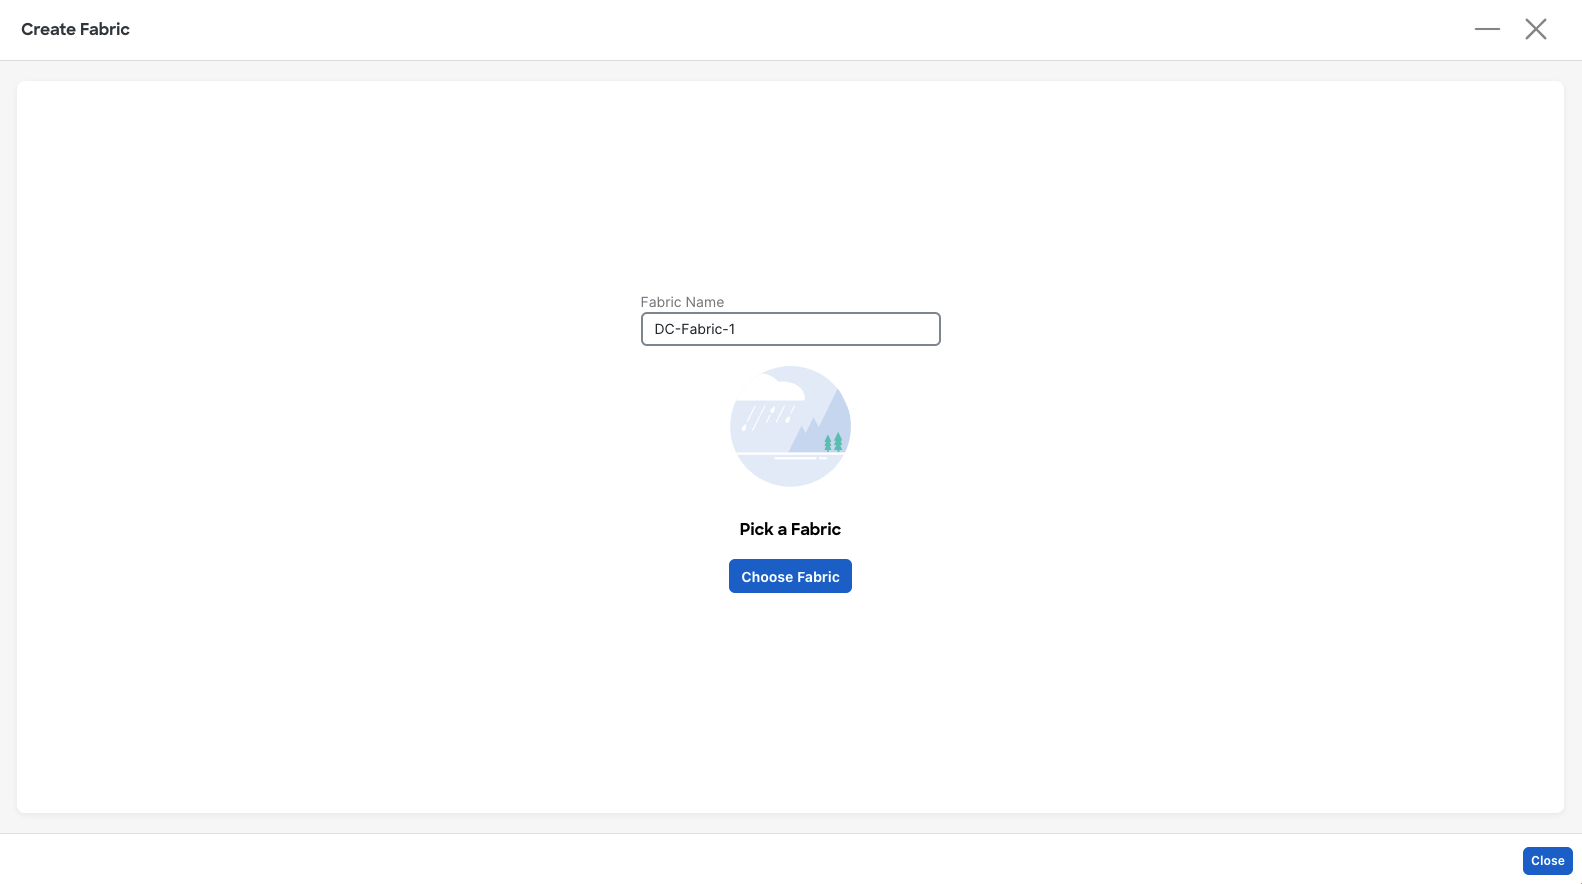
Note that the name of the fabric must be unique across all ND clusters.
Once done, click the “Choose Fabric” button below the field.
Choosing Fabric Types
Section titled “Choosing Fabric Types”Each Fabric has a Type which is used to generate consistent coordinated configuration for each switch in the Fabric.
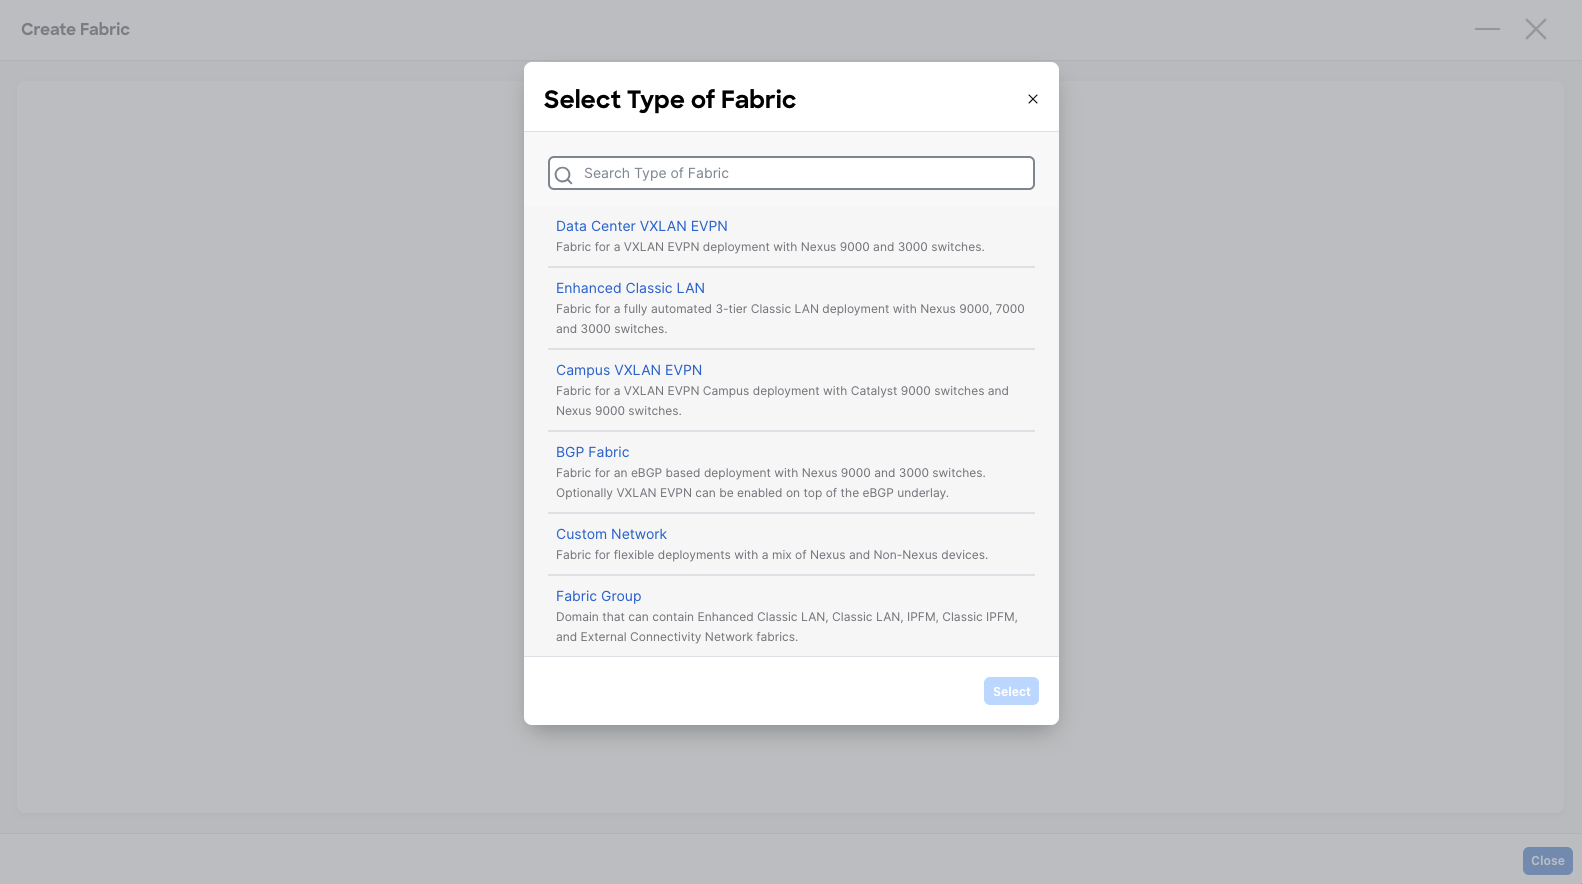
Here you will select a Fabric Type for the fabric, which is built off of a base template.
The most common Types are as follows:
| Fabric Type | Explanation |
|---|---|
| Data Center VXLAN EVPN | Fabric for a VXLAN EVPN deployment with Nexus 9000 and 3000 switches. |
| Enhanced Classic LAN | Fabric for a fully automated 3-tier Classic LAN deployment with Nexus 9000 and 7000 switches. (beta) |
| IPFM | Fabric for a fully automated deployment of IP Fabric for Media Network with Nexus 9000 switches. |
| Others | Including BGP Fabric, Routed Fabric and more. |
For most deployments of NDFC, the fabric type “Data Center VXLAN EVPN” is used.
Once a type is select, click the “Select” button below the selections.
Customize Template
Section titled “Customize Template”Based on your type selection, you can now edit and customize that template to meet your fabrics needs and specifications.
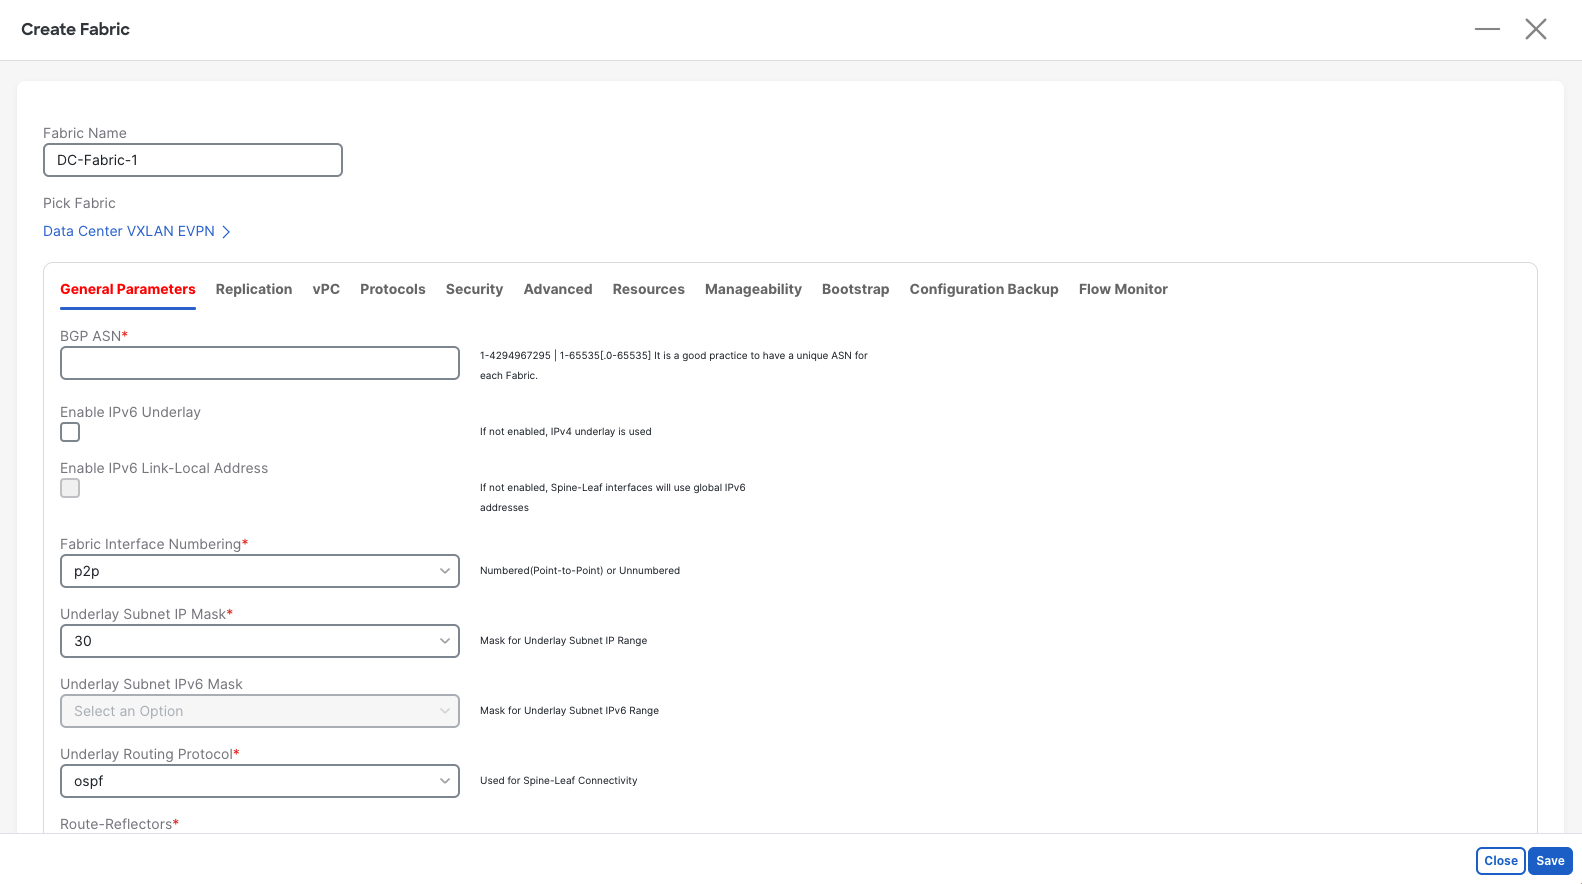
For example, you have to enter the fabrics autonomous system number.
Once you have customized it, click the “Save” button at the bottom right.
Switch Discovery
Section titled “Switch Discovery”Once you have created a fabric, double-click the name of the fabric to enter the fabric view.
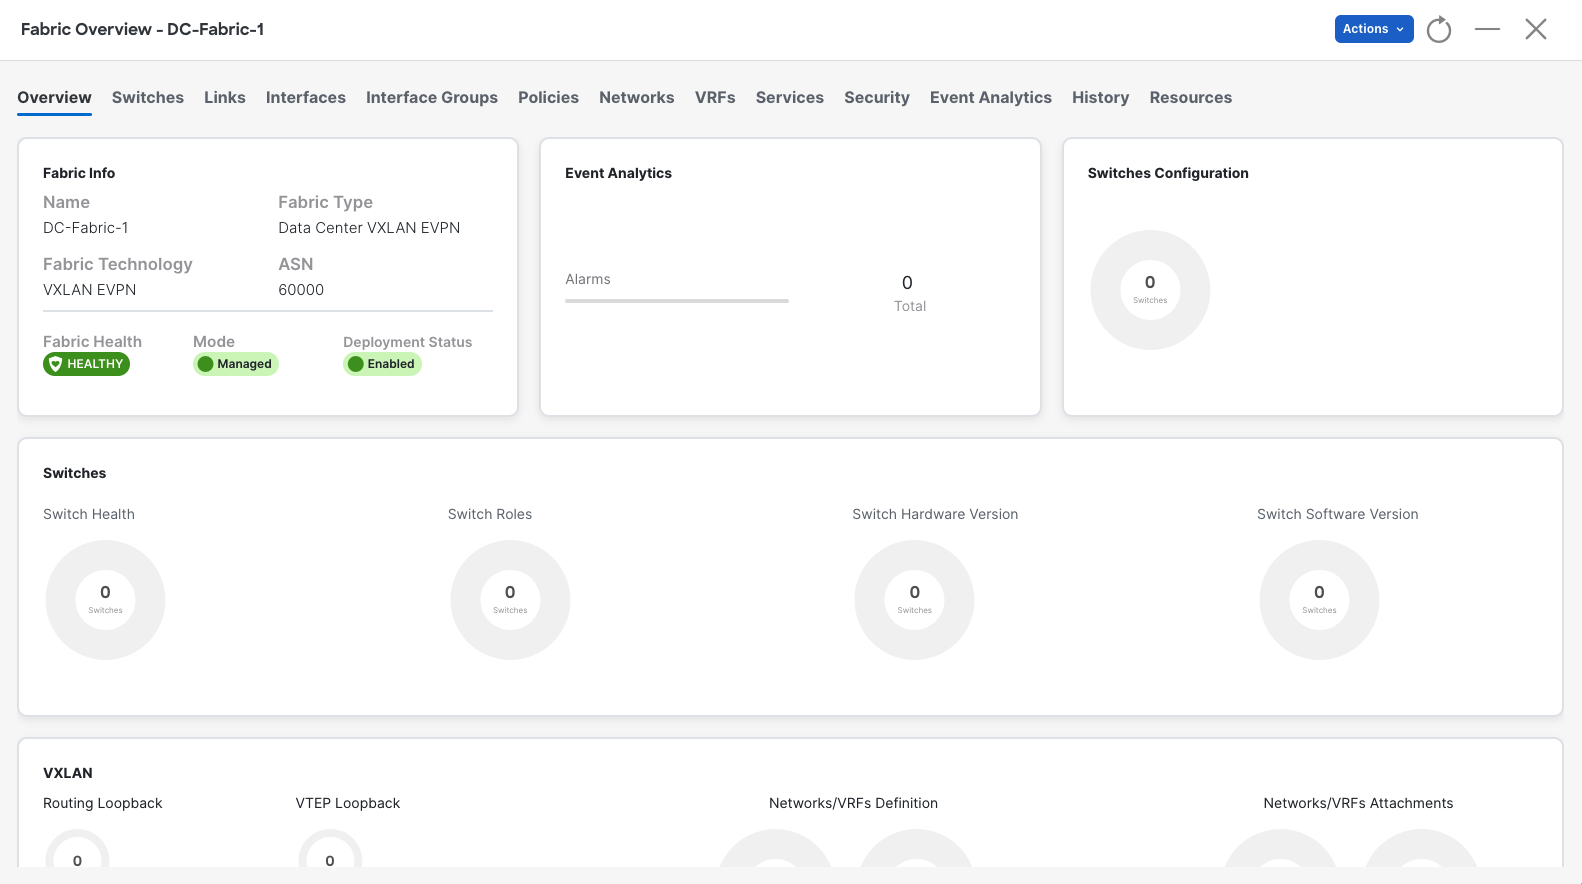
From this sub-page you can customize and configure your fabric.
To get started, you have to add switches to your inventory.
Click on the “Switches” tab, then select “Add Switches” from the “Actions” drop-down.
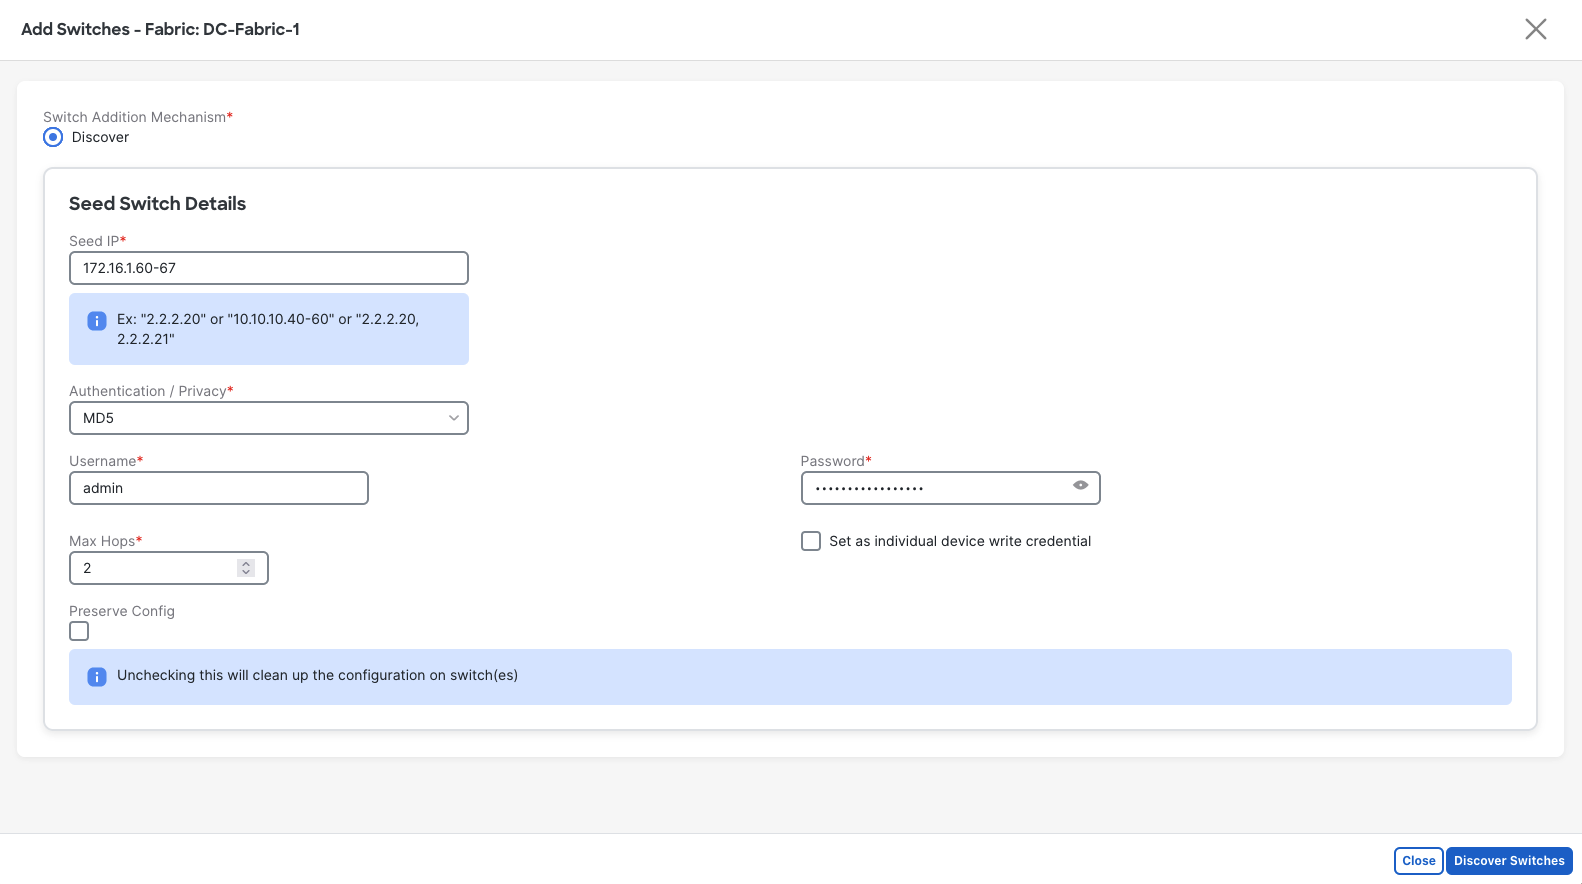
Seed IP specifies the IP address that NDFC will use to start discovering devices on. You can specify a single IP address or multiple for a more precise discovery, then NDFC will log in via SSH to the addresses, to collect information.
If you only specify a few select devices, NDFC will use CDP to discover other switches, and use the Management Address TLV to also attempt to SSH into those devices and continue the process.
Devices must be enabled with SSH and reachable via OOB to be added to NDFC.
Note: Unchecking the “Presave Config” option will perform a write erase without removing the boot or OOB configurations.
When the details entered are completed, click the “Discovery Switches” button at the bottom right to begin discovery.
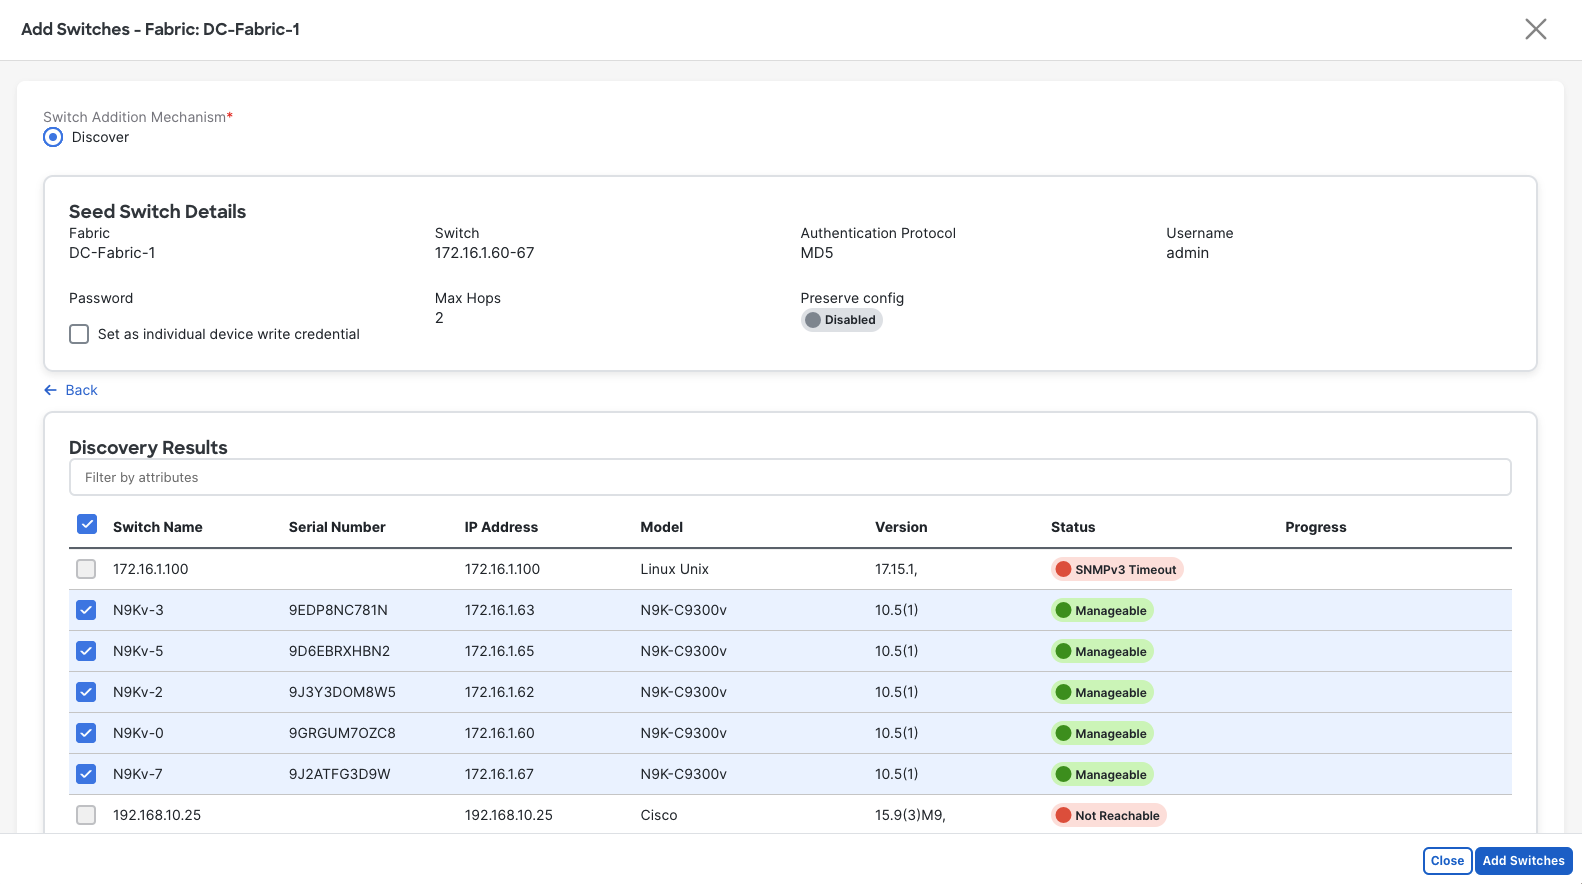
Then wait for the devices to be added to the fabric. Note that this does not push config (unless you selected an option in the type template), but adds it to NDFCs calculations.
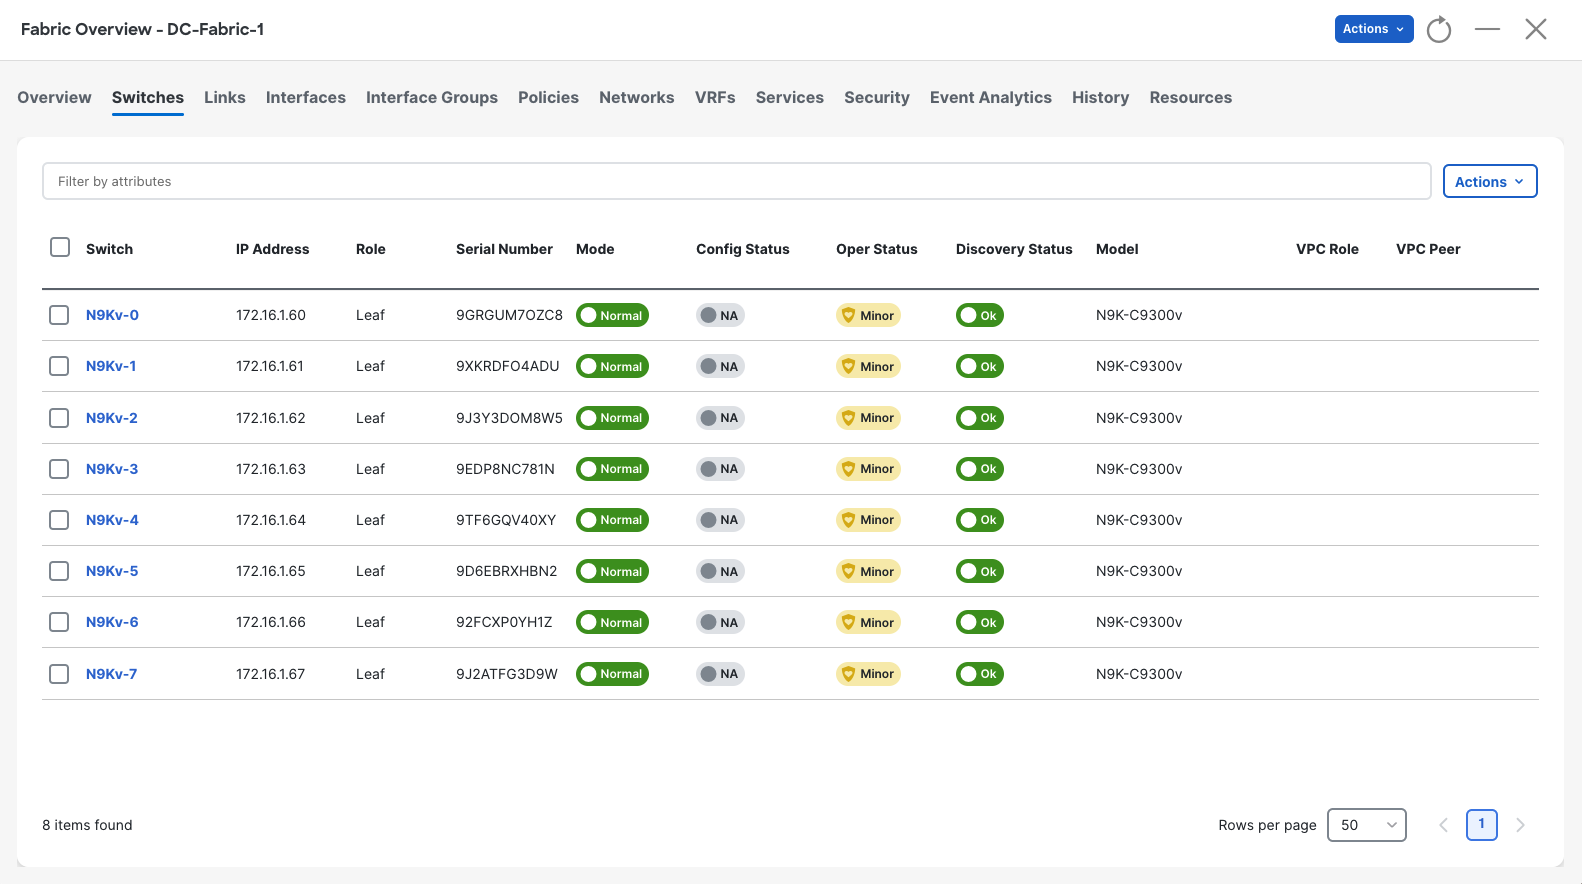
Once all the devices have cleared config and reloaded (if applicable), they will come up as “Normal”, and “Ok” in the Switches tab.
Device Roles
Section titled “Device Roles”NDFC uses manually assigned roles to determine what configs should be applied to which devices. This comes in handy, as alot of the policy administrators deploy via NDFC is loosely binded to devices or interfaces, as NDFC handles all the granular work for you.
Configurations are not pushed until the first “Recalculate & Deploy” is performed. DO NOT run “Recalculate & Deploy” until you have set the device roles in this step.
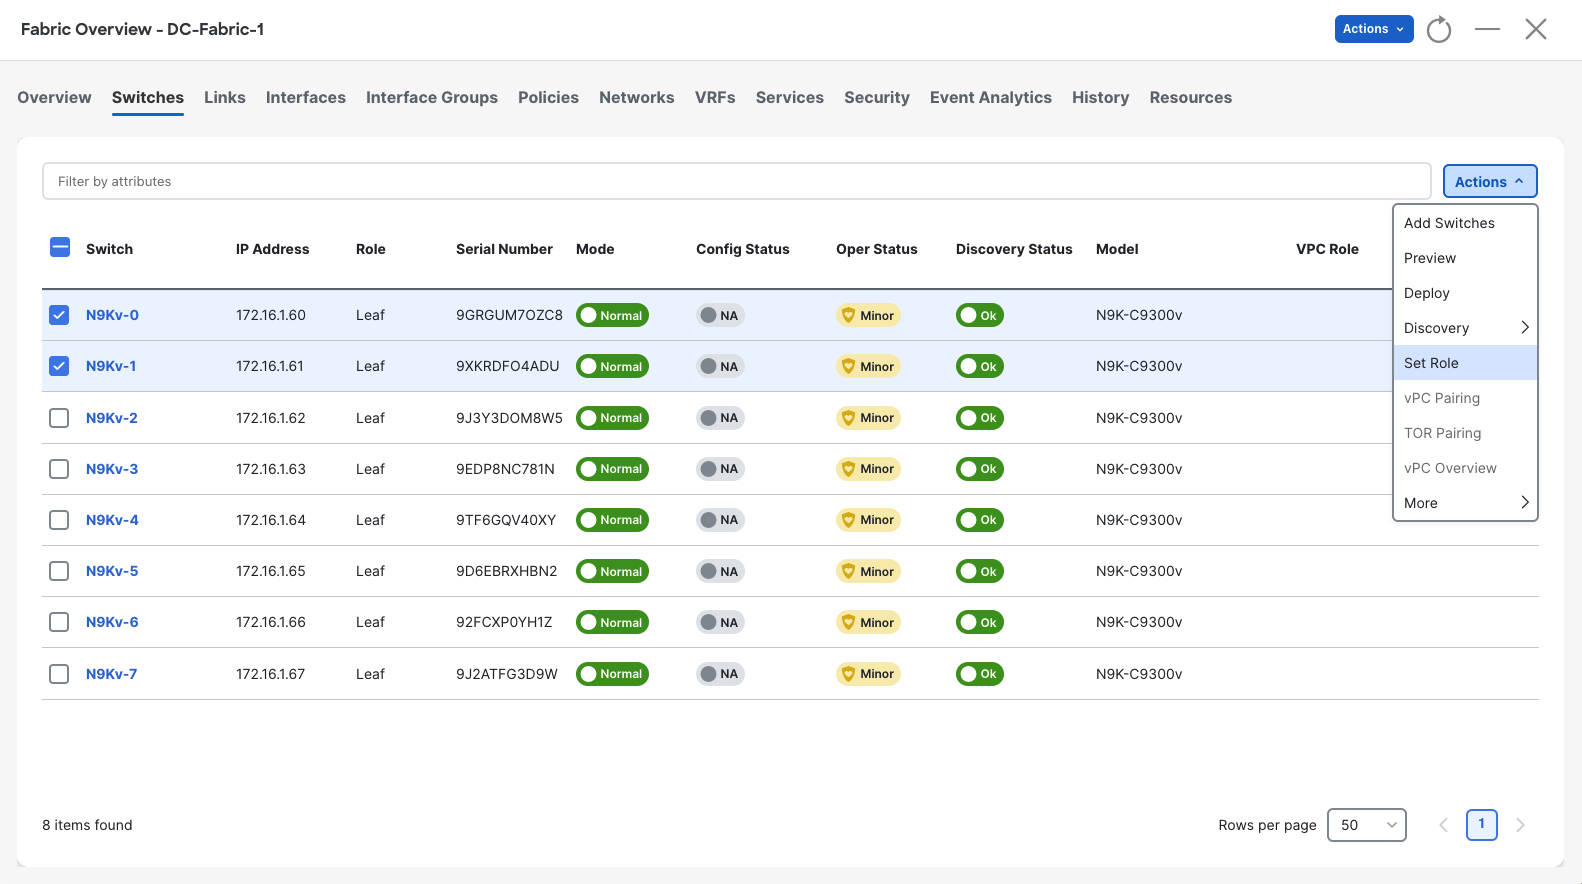
To assign certain devices to roles, select like devices with the checkbox on the left side of the table, then select the Actions drop-down, and select the “Set Role” option.
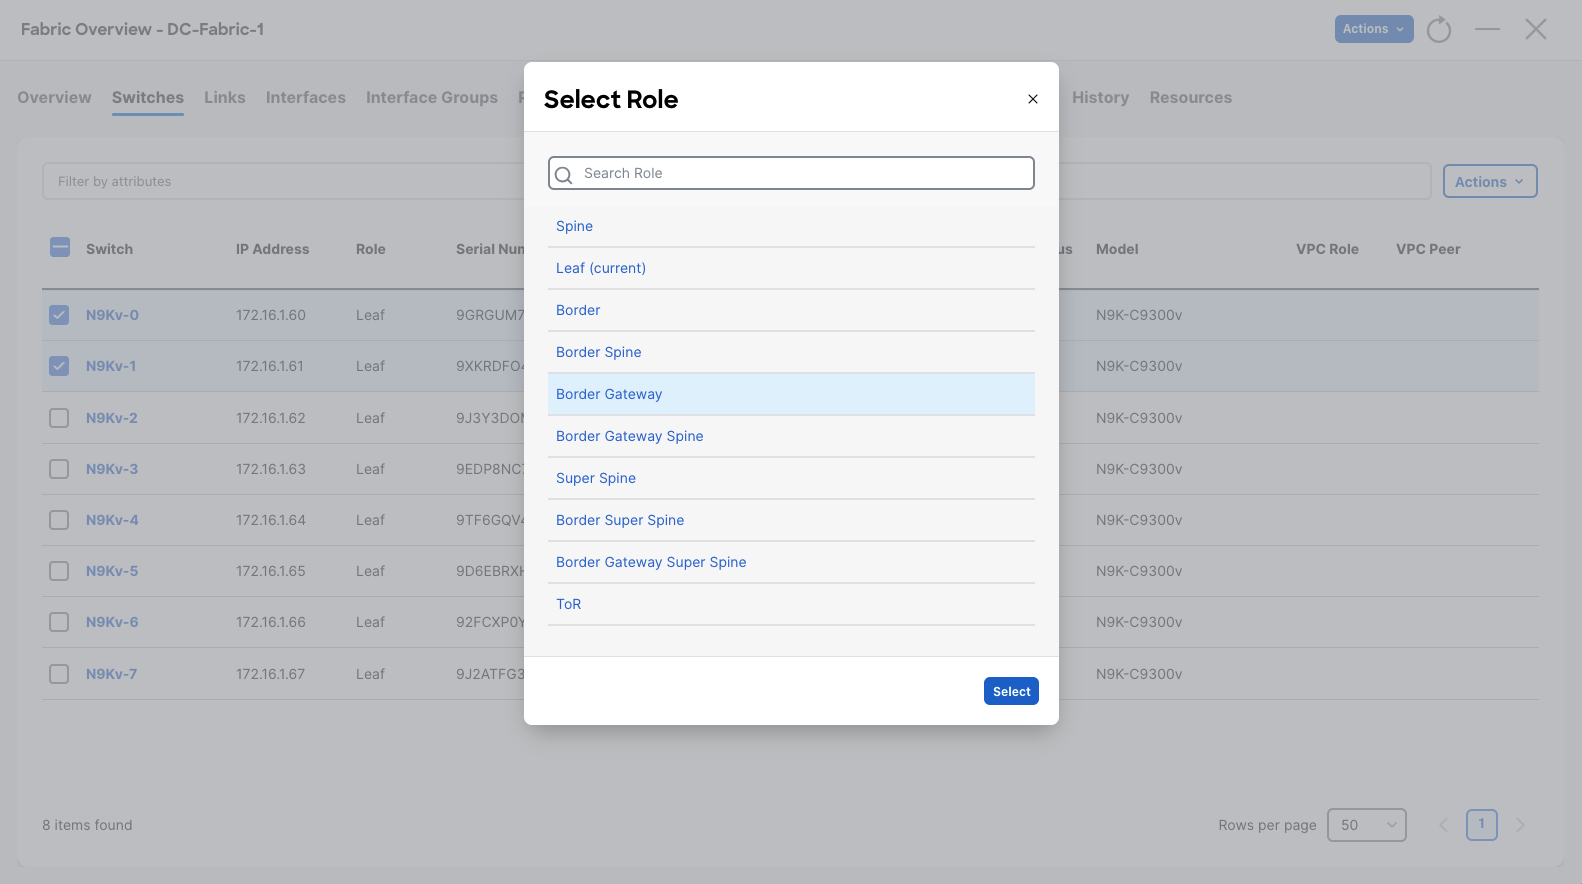
From the Select Role model, select which role you would like the device to be, then click the “Select” button at the bottom right.
Perform this assignment for all applicable devices in your fabric. Note: The default role is Leaf.
Before moving on: Be aware that once you perform a “Recalculate and Deploy” your ability to re-assign roles becomes limited! The following are permitted transitions after initial assignment.
The following shifts are allowed for the switch role:
- Leaf to Border
- Border to Leaf
- Leaf to Border Gateway
- Border Gateway to Leaf
- Border to Border Gateway
- Border Gateway to Border
- Spine to Border Spine
- Border Spine to Spine
- Spine to Border Gateway Spine
- Border Gateway Spine to Spine
- Border Spine to Border Gateway Spine
- Border Gateway Spine to Border Spine
Recalculate and Deploy
Section titled “Recalculate and Deploy”This feature is how NDFC converges its understanding of the fabric, and determines the policy to apply to devices via configuration.
This is a destructive action, which will write to the configuration of devices.
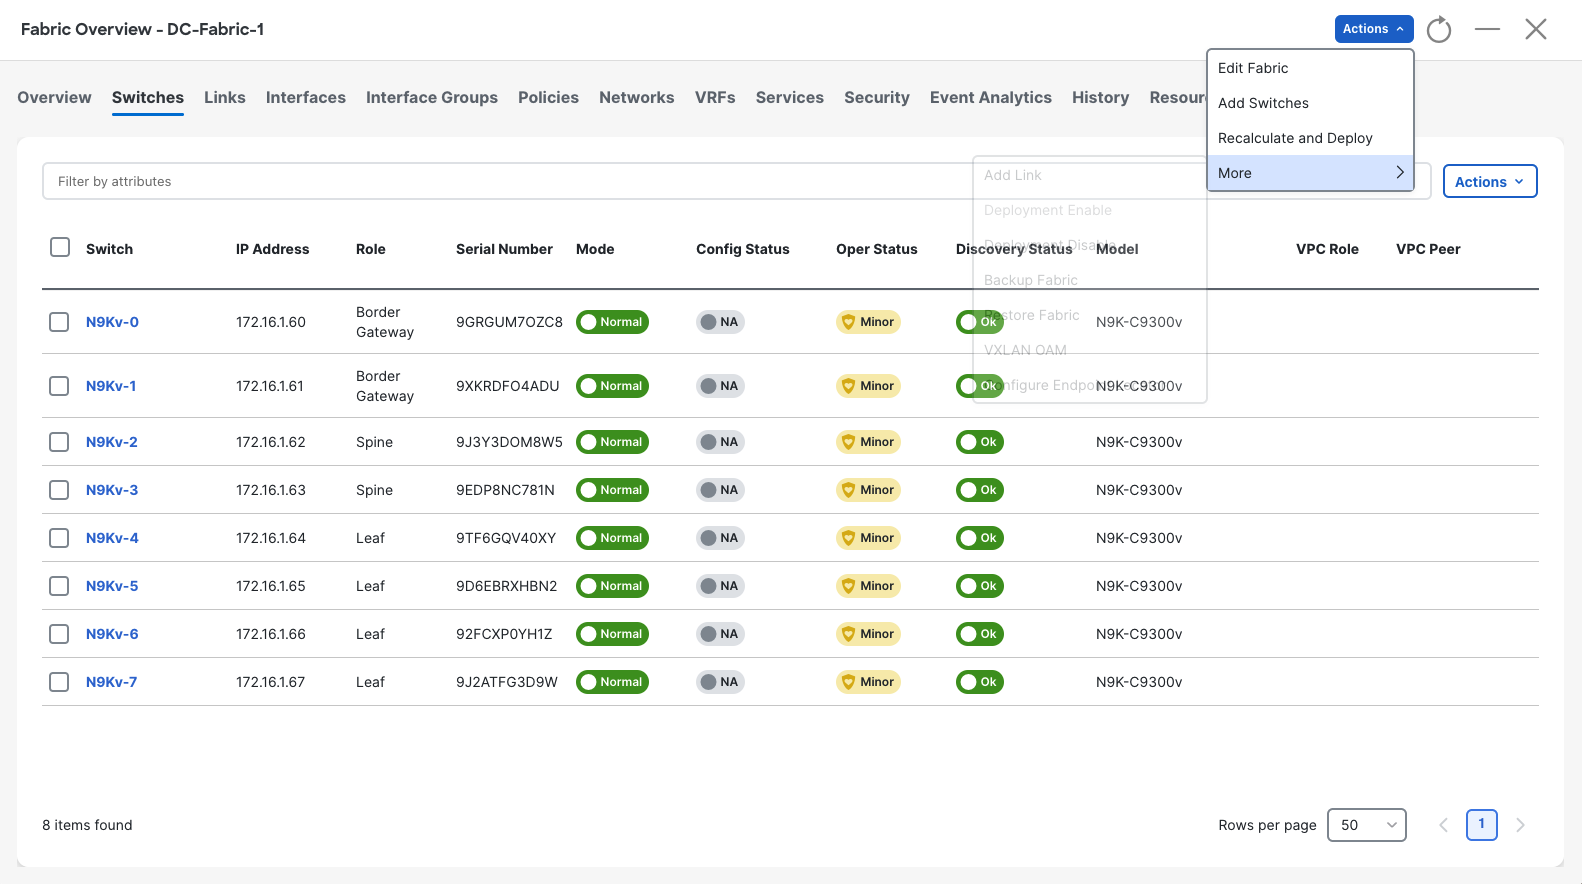
To perform a Recalculate and Deploy, select the “Actions” drop-down at the very top bar of the NDFC Fabric screen.
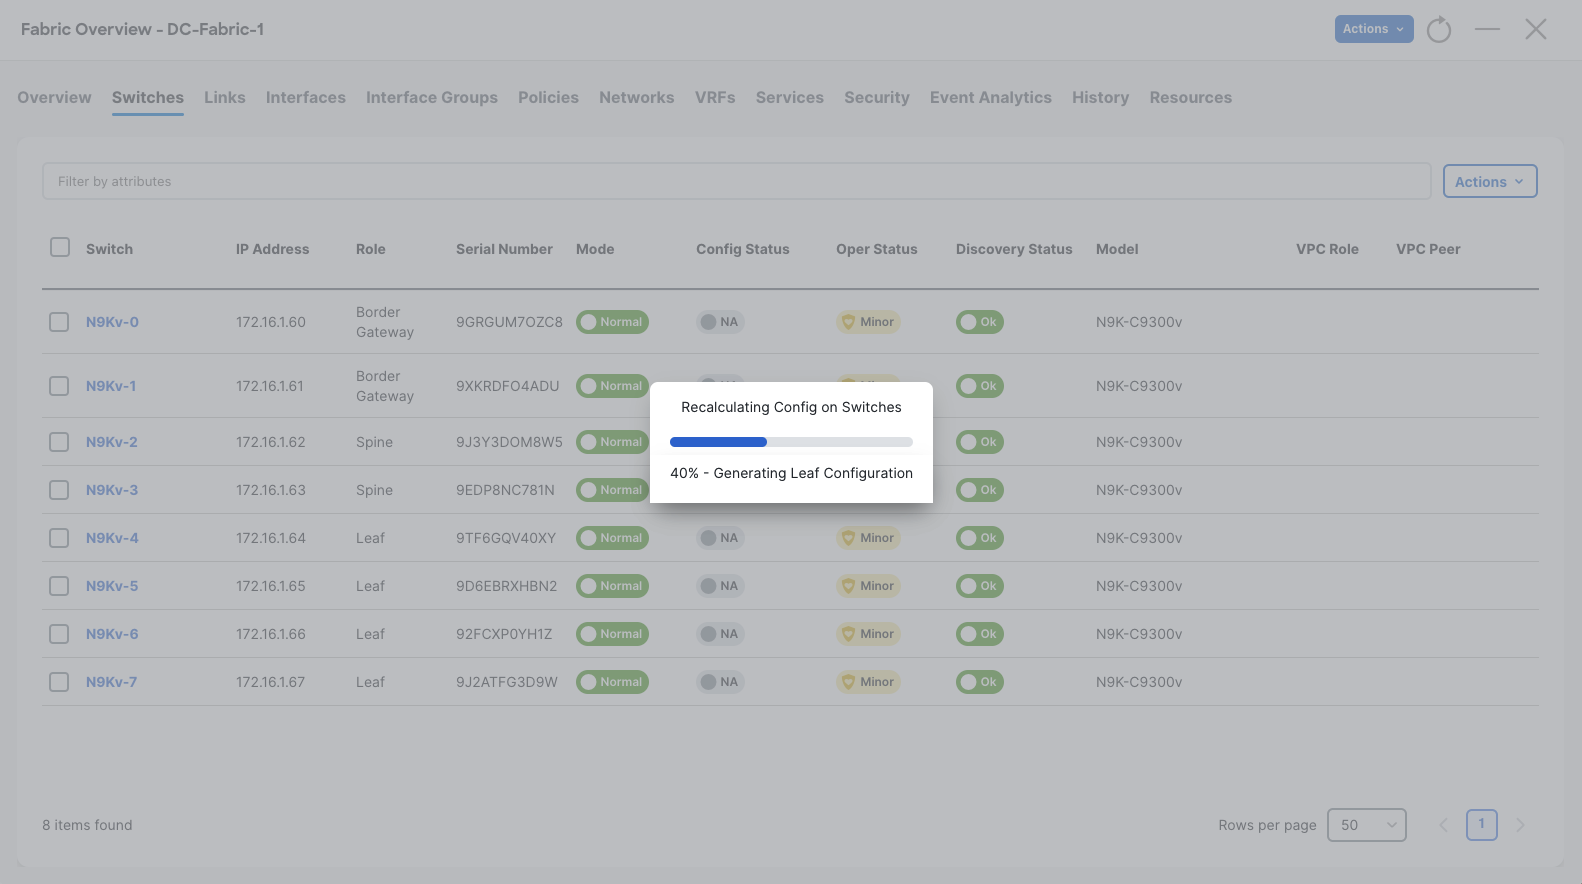
Then wait for NDFC to compile changes and prepare the configurations. If a configuration is invalid according to its policies, it will notify you at this point.
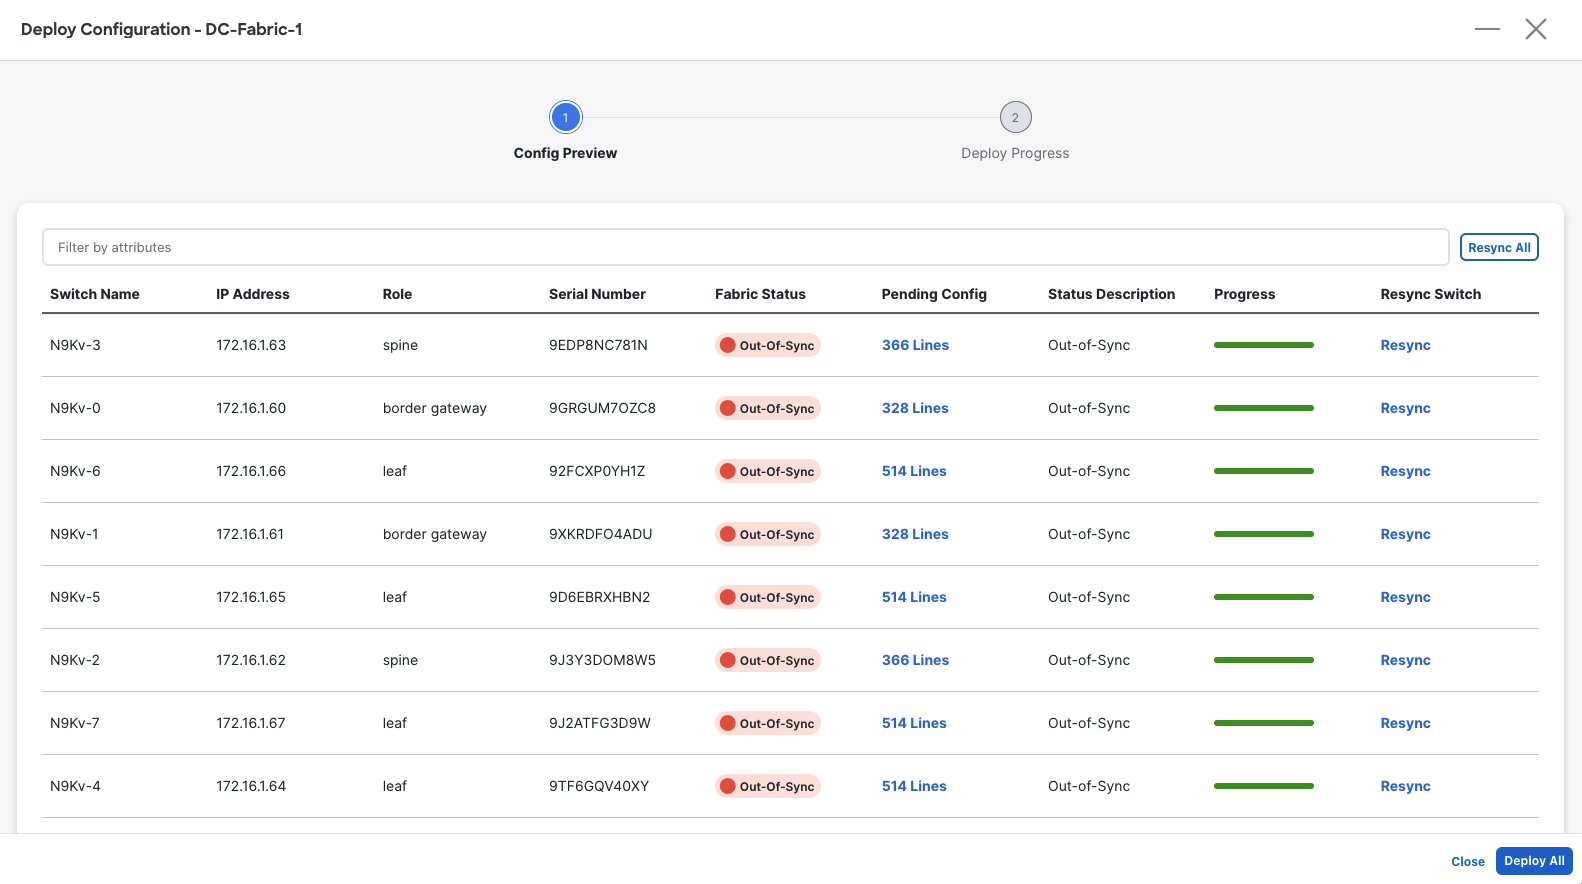
When you are sure you want to deploy the changes, select the “Deploy All” button at to begin the configuration deployment.
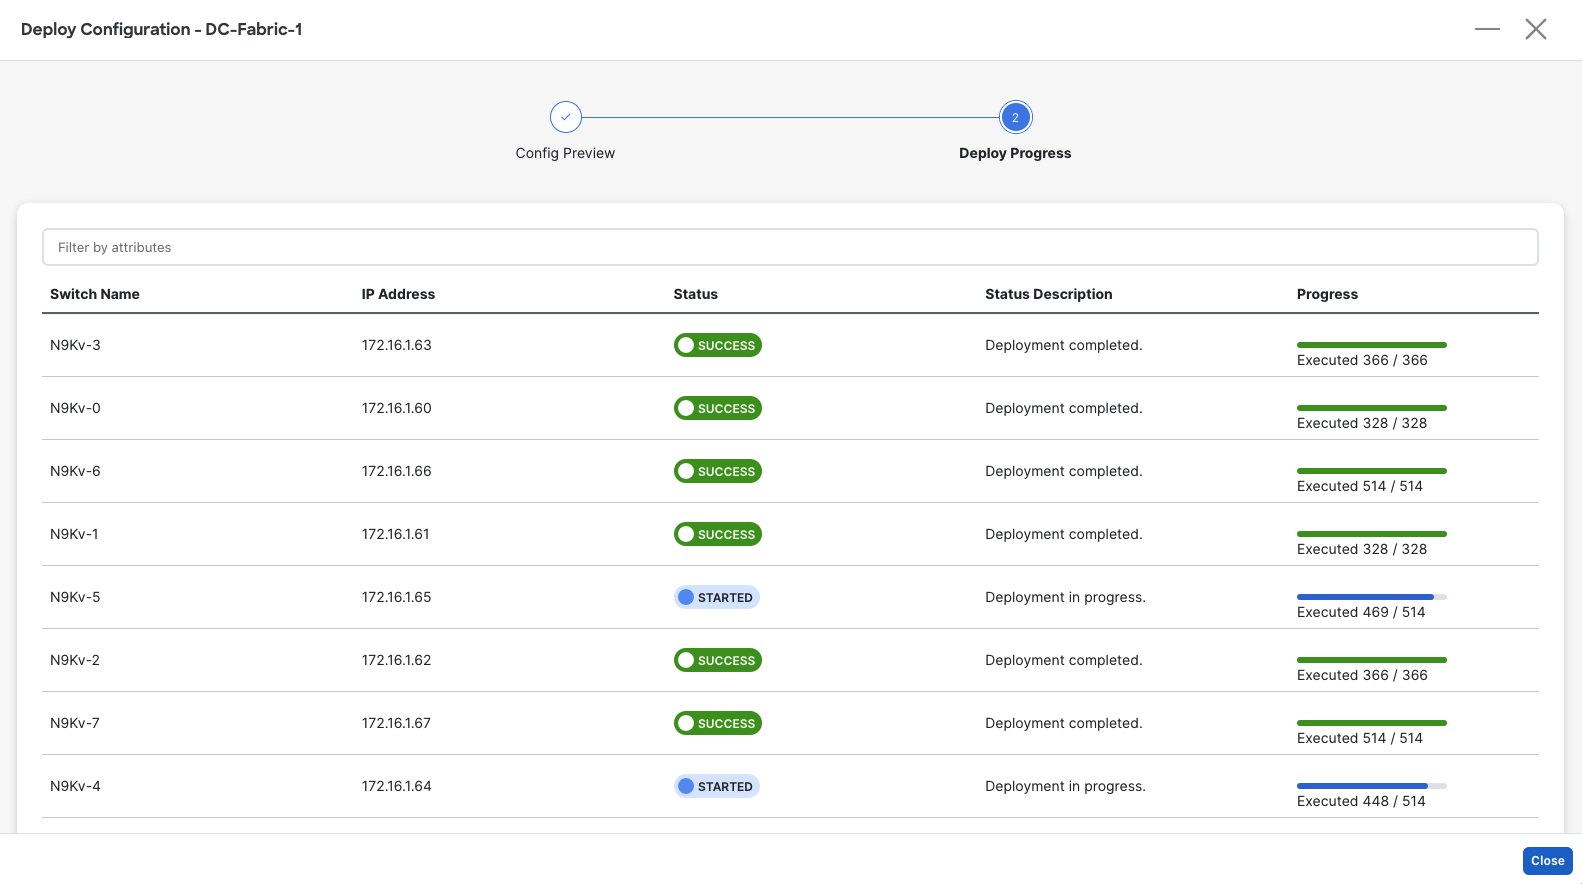
Then wait for the configurations to be deployed. When completed you can select “Close” at the bottom right.
Topology
Section titled “Topology”Topology allows you to visualize your fabrics, switches, connected end-points and links between them, enabling you to quickly identify faults in your network.
Navigate out of the NDFC Fabric screen by clicking the “X” at the top right corner.
Then navigate to Overview > Topology via the main NDFC screen.
From there, double-click the Fabric you want to view.
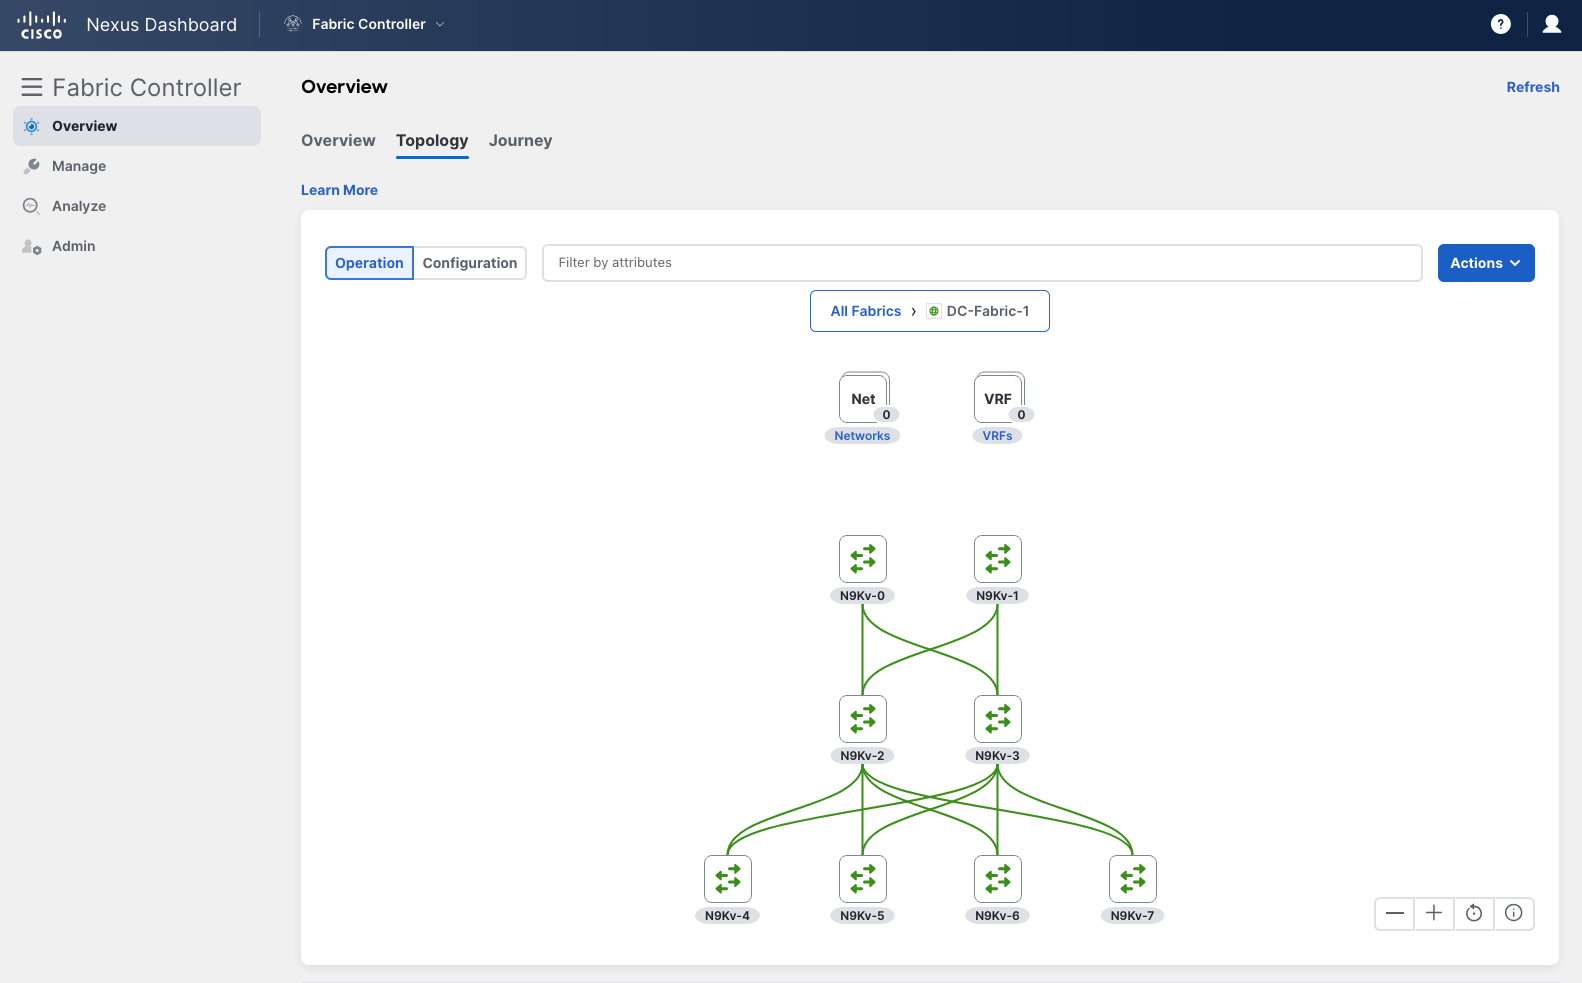
Double Click: Drill-down into specific elements. Right Click: Assign switch roles, set VPC pairs, view details and more.
This concludes the guide.